Sword in the stone brief. Concentrating on the sword, Excalibur, instead of Arthur. Set in a forest (possibly Hampstead) early morning, different shots, possibly on the last shot an actor (who will play Arthur) walking towards the stone.
Intro to Nuke
For our first lesson, we were taught the basics of Nuke. From the nodes to controls. Here is a small screen capture of the tests I did.

Then we went over the merge node and basic A over B compositing, we also went over the RGB and Alpha channels. Down below are images of this,


We were then given three exercises to do, the first one just merging a rocket/spaceship onto a forest background.


Then for our second exercise, we had to put all the windows in order and then merge the image of a fish onto a sea background.
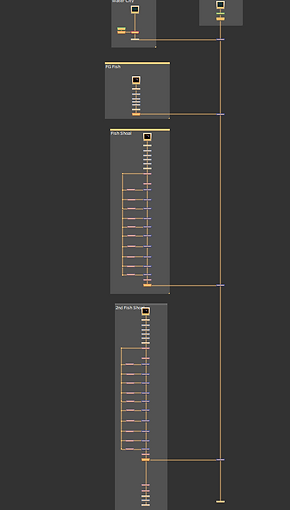

For the third exercise, we had to connect all the nodes by merging them again but as you can see the graph was a bit more complicated.


Organization and Roto

Starting off with footage of some sweets falling and rolling around, our task was to rotoscope the yellow/ orange one in the middle. But before that we had a mess around with some of the rotoscoping tools: Bezier ,B-spline, Ellipse. After messing around with different tools, we also learnt about the feathering and blur to help with the smoothness of the selection.


We then started to rotoscope,we first selected the sweet with the bezier tool, then checked it through the alpha channels. Then merged the color bar node to get this effect.


For our second task we had to rotoscope on moving images. As you can see below the clip we had to work on, is an overhead shot of buildings. The part that we had to rotoscope is on of the buildings.


Once we had the bezier tool aligned along the frames and everything was running smoothly, We then changed the color of the selected by using the grade node.

Complex Roto


In this lesson we went more in depth by rotoscoping something more complicated. Using the techniques learnt from last week, we rotoscoped around the thumb, using the bezier tool and not all in one but by doing it in sections.

Then once the thumb moved through out the footage, we had to move the shape to follow the thumb and adjust it when needed,


For our second exercise, we had to pick a more advanced clip, I decided to go with this one so I could also practise the merge node.


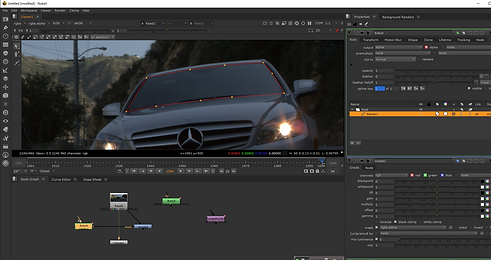
Basic Keying
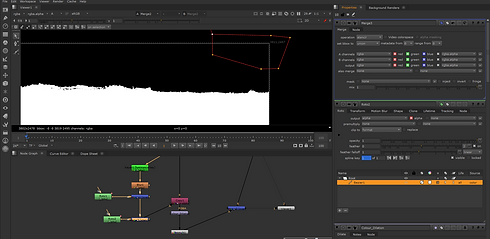
For this week, we learnt how to key. The first exercise, we had to take the original sky and replace it with another one that was provided to us. First we had to check the alpha of the image, and then adjust the black and white. It was important to get the sky as black as possible without distorting the image. once that was done we could use the rotoscoping node to get rid of what was left, and then the premult , luminance and merge node helped us bring the image all together.


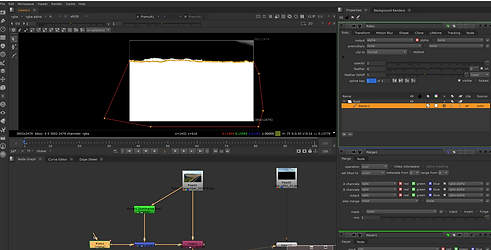


For the second exercise, we used the same techniques as the ones in the first exercise.


In the second part of the lesson, we learnt how to key out greenscreen. We also learnt about new nodes such as the keylight, basekey and erode.


I tried using the techniques we had learnt in class on another piece of footage that was given to us in class.


Advanced Keying
We started off this week by perfecting the keying from last week. By using the additive key we could keep the detail in the hair. Then we added nodes to grade the footage so the woman seemed as if she was really there and make it less fake looking.


Advanced keying exercise:


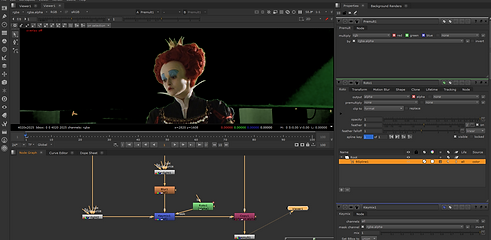


The first step I took was to reduce the noise of the image with the denoise node as it is important to have even color values because noise can cause the color values to be uneven and can cause a bad key. Then we had to roto fragile and more detailed parts of the image (such as the hair or certain parts of the dress) then using the keylight node to get a better alpha while still keeping the detail. Again doing the same process on the left screen of the image. The last few steps were to add a despill node (to get rid of any green that has been left from the green screen), premult and then merge it with a constant background. Below is the final node tree and final image.


Advanced keying Exercise 2:


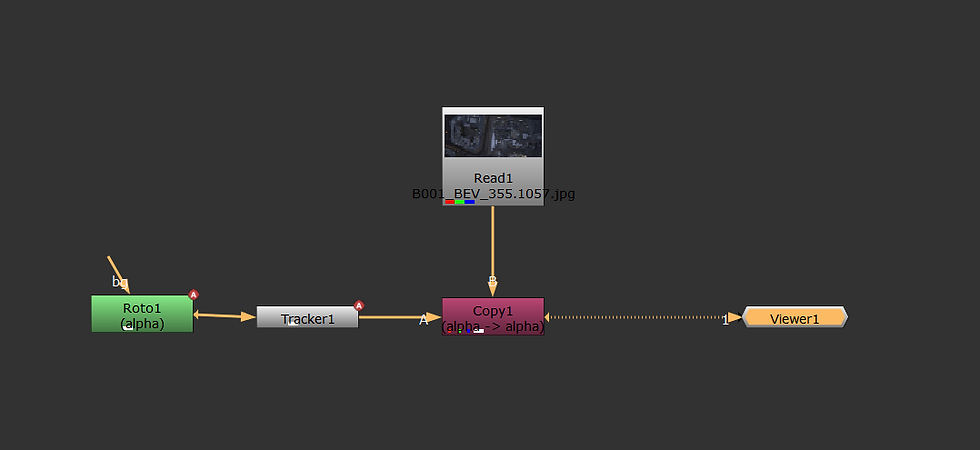
Tracking


This week's lesson was about tracking. Tracking is the art of matching a roto shape to the motion of the footage. There are many ways to track but it is mainly with the tracker node.


In the first exercise, we concentrated on the single track. We were given a small video with an already made roto shape. The task was to track the roto shape to the footage. We did this with the tracker node and using the track box to create a tracking point.Then by clicking on the traffic light symbol, we can see the quality of the track. The final step was to go into the transform tab and change it to match move and then connect all the nodes to where they need to be and then add a merge node.


For the second exercise, we learnt how to use two tracking points. By using two tracking points, you can track the video but also the rotation of the camera. After bringing the tracker node in and connecting it, I set up two track boxes and then I went into the tracker node settings, clicked the "r" boxes and changed the transform setting to 'match-move' and set it to the current frame.


For the third and final tracking exercise, we had to track the windscreen and the number plate. For this we used the Planar tracking technique. After rotoscoping the windscreen and number plate, I then clicked on CornerPin2D (absolute, baked) in the menu. Once the corner node popped up, i went into it's setting clicked on "copy from". Then in the "from" tab, then clicked on "copy to", I set everything to "no animation" and I then moved the roto to match the windscreen throughout the footage.
Grading


For the first exercise, we had to make the woman fit in to the scene better, before grading she has a warmer and more saturated hue than the scene behind her. To blend the two together, we first need to bring in the grade node and rename it "luma", this will focus more on the darkness of the blacks and the lightness of the image. We then brought in another grade node and called it "colour". Then the saturation node, and cooled the hues down. I then brought one last grade node and the rotoscope node, I rotoscoped around the woman where the sunlight would hit her, dragged down the rotoscope shape and lightened her even more.

For the second exercise, we had to grade out a little blob that was present on the floor. We did this be grading throughout the footage and keyframing it.


For the third exercise, we learnt how to colour grade the whole scene. We did this by bringing the keyer node and changing the values there, then by bringing in the grade node and changing the colour.


For the forth exercise, we brought in the roto node and rotoscoped around the glass panel inside the door. Then we brought in the grade node and changed the colour of the panel. I repeated this for the next few glass panels. I then added the third exercise to the forth one to create this scene. The red and purple panel could be rotoscoped a bit better throughout the footage.


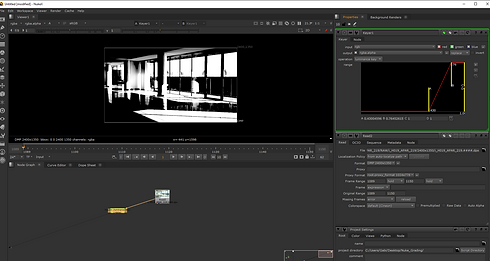
In this scene we had to grade it so everything would match. We did this by using multiple grade nodes, one of them being called Luma (which would change the luminescence)and played around with the gamma, multiply and lift. The other grade nodes would be called Color, Grade and saturation (and i did exactly the same technique until it matched). Color look up and
on the graph, I selected the master and I changed the coordinators to 0.01 and 0.01 then I selected the bottom corner and pressed F to frame the image. I then selected the top right dot of the graph and pressed L. And this is what I ended up with.
Cleanup and Patch Repair


For the first part of the lesson, we were given the task to explore the clone tool and had to make the markers disappear with the rotopaint node.


In this exercise, we had to take out the old man from the footage. I did this by using the tracker node and tracking the step, then I used the framehold node on the hero frame. I then brought in the roto node and drew out a rectangle on the frame hold. I brought in a blur node to make the roto less harsh and then a premult node. I then used the multiply node so that the girls would not disappear behind the roto. By bringing in the Merge node and making sure everything was connected properly, I ended up with this.


I then tried taking out the two girls out of the footage as well.


Complex Cleanup
I then brought in the denoise node and a grain node so I could match the grain into the patch to the original footage.


This week, we had to take the group of people out of the footage. I did this by rotoscoping behind the group and then tracking it (with the cornerpin node). I then used the framehold node. I then used a copy node and a new rotoscope node and rotoscoped around the group of people. I then brought in the rotopaint node and cloned different patches of the ground over the group of people and cloned the edge of the the step over certains people's heads. I then brought in a grade node and roto node in and grade the patch to fit the rest of the footage. I then placed the cornerpin node underneath the premult node and merged everything together. This was my result.
Advanced Clean Up


In this class, we continued with cleaning up different footage. For this one we had to take off the logo and the child's arm shadow back in.
Assessment 2
For our second assessment, we had one big task that consisted of loads of mini tasks to do. We had to take this footage (below) and remove the logo on the bag and the markers in the background, key the green screen and replace it with a constant and replace the black tv screen with the color bar node.

Markers


So I first started with the markers in the background. By finding a hero frame where all the markers were visible and using the frame hold node and the rotopaint node, I was able to cover the markers with the clone brush and keep the hero frame. I then used a copy node and rotoscoped around the patch where I had rotopainted over, I also used a blur node to make sure the roto shape wasn't "harsh". I I brought in another roto node to rotoscope around the man in the scene since walks in front of some of the markers. I added a merge (stencil) node and a premult node.
Logo


Just like for the markers, I brought in the rotopaint node and used the clone brush and painted over the logo and brought in the frame hold node in. I used a rotoscope node and rotoscoped around the patch and i brought in a premult node. I also wanted the rotopaint patch to follow the movement of the bag so I needed to track it by using the planar track and a corner pin node. The patch didn't match the bag throughout the footage so I brought in a grade node and changed the patch so it matched the bag.
Keying


To replace the green screen with a blue background, I used the keylight node and keyed the green then I changed the channel to an alpha channel and and played with the clip black and clip white. I then brought in a second keylight node and repeated the same action. However instead of connecting it to a merge node, I connected the second keylight node to a filter erode node to keep as much detail of the man as possible. I then brought in the despill madness to take out any green that was left over. I also added two grade nodes in one for luminescence and the second for saturation. I cpnnect all that to a merge node that was connected to a constant.
TV Screen


For the TV screen, I brought in the colorbar node, i then brought in a reformat node, formated it to the footage's size: HD 1080.I then brought in a cornerpin node and transform node. I scaled it down and moved it to fit the tv screen. I then brought in grade nodes to make sure the color bars didn't look odd and weren't popping out too much. Also with the angle of the TV, the colors wouldn't be too bright and would be more dull and that's where i brought the saturation down. I also brought in the defocus node in. I then had to rotoscope around the man so he wouldn't disappear under the colorbar node.
Final Result


Once everything was connected by using multiple merge nodes, I used the write node to render it out and this was the final result.
Second Version
